Hmm, I’ve got a lot going on at the moment. I’ve just become a father again, changed job
and country and now it looks like I’ll have to change job and country
again. All my hobby stuff (not only
actually, all my regular stuff like clothes etc too) is in Tbilisi and I can’t
get back to any of it or collect it because I’m too busy. What I definitely don’t need now is an 81 day
deadline to build and paint an army (that not only do I not own but I haven’t
even selected yet).
But that’s where I’m at. I’ll be attending the AoS ToS Doubles in October (October 12th and 13th to be precise). Why? Well for lots of reasons, some of which are good, some of which aren’t really reasons and some of which only make sense to me:
I haven’t had the buzz of a tournament (not the competitive buzz, I never really feel that, I mean the buzz of being away for the weekend with my gaming mates) since the 40K GT heat (you can read about that here)
The event I’m going to is AoS. That’s part of the problem (I don’t have a functioning army) but also the solution to one of my longer-term problems and the reason for this blog (ie. I want armies for all the major GW systems and to play more events).
The event I’m going to is doubles so I ‘only,’ need 1,000 points and I can fill the other 1,000 points for a functional WHW GT or ToS event later on
I’m looking at going to Blood and Glory in November to play 40K so if I don’t get AoS sorted soon, I’ll be struggling to get it done this year at all.
There, those are my reasons to do this and I think they’re
pretty good. There are, however, some
headwinds:
I don’t have an army. Actually, this is not really true. I have enough points in a Gloomspite Gitz army to take but they’re painted really, very poorly and I’m not that into them anymore. I also have a kind of Empire / SCE mash up and the same applies there. I have a (WHFB 8th Ed) tournament optimized Beasts of Chaos army but they’re on squares and I don’t want to go there. Basically, I don’t NEED a new army but this wouldn’t be much of a blog if I was just going into my parents’ loft and dusting off old miniatures
I don’t have immediate access to my painting kit and materials. Ok this is starting to become a real problem. All my painting kit (airbrush and compressor, paints, brushes etc) is in Tbilisi and it’s not clear when / if I’ll be able to get them back. In the first instance I’m sure I can build any army, get it all prepped and filled etc and choose a scheme by which point what is happening with my paints may be clearer. Who knows. The worst case? I buy a couple of rattle cans for zenithal priming and some paints as I go to get this army finished. The best case? I have all my shit and these end up looking gorgeous. The most likely case? Somewhere in between.
So
with the trivialities of armies and painting compartmentalized nicely, time to
get on with things!
It took me quite while to decide on the aesthetic I’m after for my AT army but I’m going with free hand over a pink / grey armour plate scheme. You can read about how I came to that here.
I’ve also built the sub assemblies for the knights and titans (you can read about that here). When I’d put everything together I could see that there are a lot of fiddly panel edges which spill over onto the armour panels themselves. My plan to cover the panels in freehands (skulls and masks) means I need the larger armour panels to be as clean and empty as possible. So some scraping has been required.
I’ve done a lot of armour plates but here are some representative ones:
It’s a fairly agricultural process to be honest – scraping with a knife then sandpapering to smooth it out. It look horrific at the moment because of the contrast between the cut plastic and the original but once this is sprayed over it’ll be fine. I did make one slip in the process with quite a big armour panel:
This has been butchered a bit, to the extent that I’ve removed the panel edging on the right of this. I’ll have a look at how it all goes together and either leave it or reinstate it with some green stuff.
So that’s it – not much progress this week as I’m running out of things I’m able to do here (I don’t have my paints or any more models). Next week I’ll be looking at something a bit different – picking my hypothetical AoS army.
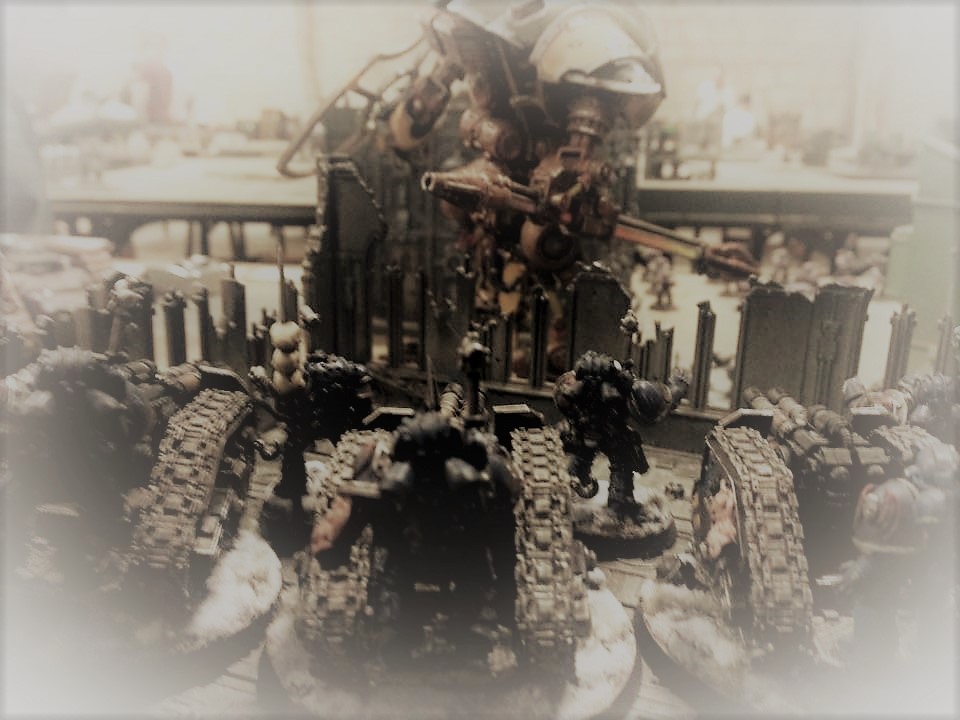
Ok so I’ve built my knights (you can read about that here) and now I’ve turned my attention to the real meat of the Grand Master box set – the two Warlord titans. I’m looking to build these in sub assemblies and leave as much of the armour off of the model as possible to make painting easier, so this is not a full walk through of the build. Also, I will be magnetising (I’ve done it before with my Bananamen here and it was easy and makes life so much simpler) but I don’t have the magnets with me right now.
The legs.
The first part of the model to complete is the legs. These went together fairly easily. However, do pay particular attention to two things:
Make sure the holes in the feet are lined up with the tracks on the lower legs. If you don’t, there are a set of pistons covered in armour (which is why they’re not on the model) won’t line up. Carnage.
Spend some time getting the pose of the legs right. The first one I did, I’m really happy with, the second one not so much.
The body.
Ok, this was pretty straightforward in terms of the build itself. But…having built some of the Shadespire stuff recently and being really pleased with the fit of the pieces, I was surprised to find that a few of the body pieces join together in ways that really show the seam. Like this:
And this:
It’s not a complete car crash, it just needs filling and sanding, but some of the areas are quite difficult to access. I really want these to look the business so it’s happening.
The weapons.
Same story really, went together nicely but with some ugly looking seams. There are some armour plates moulded onto these which I’ll have to work out how to paint subsequently I’m magnetising these bits and the magnet holes are really easy (5mm by 1mm strength n42 is what you need).
So that’s how the titan (minus the armour plates) goes together. Having had a good look at the armour plates, they are very fussy and I really want the freehand top be a major element of this project. So, I’m going to take the scalpel and liquid green stuff to a few of the plates to give myself a bigger area to paint on.
I know what aesthetic I want for my Titan army (you can find out more about that and my taste in visual art here). Now is the time to build the models (my least favourite part of the entire hobby) before I can get on and paint (my favourite part of the hobby.) (Actually my favourite part of the hobby is dragging my mates to Hooters in Nottingham while we attend tournaments at WHW). I’m going to start with the knights because I don’t know if they’ll make th efinal list so if I fuck them up I won’t cry. I won’t be very happy but I won’t cry.
Before I get too far into this there are a couple of things to bear in mind:
I want to build these in sub assemblies to make painting easier. Now, that’s not as straight forward as it sounds as you’ll see later (actually it is straightforward to do, it just isn’t very satisfying).
With big stompy titans all over the place, I do want some dynamism in my knight poses just so I don’t have an army that looks like a bunch of Coldstream Guards on sentry duty.
Right, onto the kit. I just used my standard building tools (clippers, hobby knife, small file, tweezers (I didn’t need the tweezers actually) and Tamiya thin plastic glue). I won’t go through the building process step by step, the instructions are fairly easy for these models (I understand from the internet that the Warlords are more complex) and the bits I built went together pretty well. I have a few knights in 28mm scale and I actually didn’t find them to be so straightforward (they’re in the image above) so I was nervous about these little guys but they were fine. Now what do I mean the bits I built? Well…
The sub assemblies.
Here’s the thing. The chassis of the models will be TMM steel with an oil wash. Using oils complicates the process slightly because for acrylics to go over the top I’ll need to apply varnish (not that hard but an extra step and oils take a relatively long time to dry. So, the ideal position would be to have anything that’s getting an oil wash built in one sub assembly with nothing that isn’t getting an oil wash on the same sub assembly. Following? Cool. That’s not possible with the knights. Here is my main assembly:
There are a few moulded sections (the chest plate, the cricket box, the thigh armour, the knee pads and the feet) that can’t be separated from the assembly. Because of how the rest of the assembly will be painted (by airbrush) these pieces will end up painted TMM and oil washed and I’ll have to go over them with my armour plate colour subsequently. No biggie, especially not for pieces this size, but it may effect the final colour / finish compared to the parts I’ve left off (which, for completeness, are the canopy, the head, the shoulder gun (I’ll run three with heavy stubbers and three with melta guns I suspect), the shoulder shield and the shin pads. (Just a tip here, I removed a canopy from the sprue and dry fitted it to each of the assemblies when I glued the weapon arms on to make sure they won’t foul each other when I come to glue the canopy on – I have some arms in dynamic poses)).
I’m slightly stressed about the dick flag thing – It’s moulded plastic (obviously) with no dynamism at all – I want all of the flags on these models to look really dynamic. A friend has used cut up coke cans to model purity seals and I think it would work with banners and flags so I’m going to have a look at that.
Knight fever, Knight fever.
Posing the knights was fun. I wanted a sense of weight in the poses – even though these are, approximately, terminator sized in 28mm scale they are still huge machines so I don’t want them to look like they are ballet dancers. However, I do want them to look dynamic and posed as if they’re moving. Here they are all together:
I have two units of three. I’ve left them off of their bases (I did have the bases handy to make sure they stood up without any issues etc) because I haven’t decided what I’m doing with the bases yet and want to be really flexible.
What’s next for these guys?
Well, they don’t need any gap filling that I can see. I still have to work out what I’m doing with the banners that hang from their undies and I’d like to add some battle damage to the canopy and shin armour (using a Dremel and green stuff). Once all that is done I’m ready to get all the separate bits primed then painted but I don’t have any painting stuff with me at the moment so that’s likely to be a while off yet – next cab off the rank is building the two Warlords.
I really like this process. This part of building and painting an army (ie. the bit before I’ve actually done any of it) is maybe my favourite bit. I just sit back and close my eyes and I’ve got a beautifully painted army, I’m really thrilled with it, all my mates love it and it wins heaps of awards. Then I actually get down to the nuts and bolts and it kind of slides downhill from there. NOT THIS TIME! This time I am going to follow the aesthetic through and really nail my most beautiful army; My Adeptus Titanicus force.
So what’s this section all about? Well, I have a lot of ideas swirling around in my head about elements I’d like to use and there are some extra bits that I also want to model. This post is about thinking through the aesthetic elements I want and ordering how I make sure they are all represented on the table top. I don’t know where this post is going as I write this section (and it’s likely to be long) but this is my blog, where I work stuff out so I don’t make any apologies.
Firstly, what do I want to include in my AT force?
Titans. Duh. Well yes, but I only have two of those currently and two banners of three Imperial Knights. So I want to get the aesthetic across these models before I buy more
Terrain. Everything I’ve heard says that terrain is super important to this game. I’ve got tonnes of the stuff GW launched with but they’ve launched new kits on top and I want a varied battlefield. Terrain is often the last thing anyone wants to build and paint and it’s very rarely done to the standard of an army so I want to change that.
Objective and death markers. When titans die, the area their base occupied becomes difficult terrain. I’d like to model a base for every titan I have that represents this. Also, I don’t know if objective markers are a thing but if they are, I want to make some of those too.
Display board / tray. Yeah, tricky one this. People that have display boards are called Display Board Wankers at my gaming group. It’s hard to argue against that. But, if I can make one, get my terrain and my army based into it and looking great, it might help me snag some painting noms. Also, if I can fabricate something that makes it easy to carry my army around on, even better.
So I want an aesthetic that I can carry across all of these elements. But what specific painting and modelling elements am I really after?
Good bases. Generally bases are something I do after I’ve painted an army. I generally use some texture paint, give them a wash, maybe do a dry brush then add some flock / gravel and rocks to them (a throwback to my railway modelling days) and black the rims. If I can tie a basing scheme in from the beginning I think I can do it better than that.
Freehand. I’ve done some freehand that I’m pretty pleased with over time, from Fulgrim’s cloak to Eidolon’s jump pack to the banners on my competition piece. I want to include this
Weathering. I don’t mean covering everything in weathering powder like I did with my EC’s (much to my gaming group’s ongoing amusement). I mean more, rust from scratches and chipping etc. I’ve done a bit on various things but I want to take it to the next level
Oil washes. I used oils on my 40K objective markers and they gave them a really cool ‘grimdustrial,’ look. I don’t think I’d use an all over wash for armour panels but Vince Venturella has a great video on his Hobby Cheating feed where he really makes some metallics look superb with an oil wash. Talking of that…
TMM. I’ve really enjoyed painting NMM and I think it’s levelled up some of my skills (blending, glazing etc) but I just think my TMM game is better at the moment and I want this army to be the best I can do right now. I want the metals on the armour plates to be like the arm shield thingy on my competition entry:
Conversions. I’ve done a few conversions (poses and head swaps mainly) in the past but I think I can use this to level up too. I have a friend whose Dark Eldar army is a conversion in every model and another friend whose well painted but, ultimately, three coloured army won a best army gong at Throne of Skulls because of his conversions. So conversions are a thing for me right now. One immediate area is actually influenced directly by my ToS BA winning friend who has used strips of tin can to create purity seals with real dynamism to them (rather than the very static GW ones). I think swapping out the ‘dick cloths,’ (I don’t know what the real term is (clearly)) on the titans for this material would look much better and I’m also really up for making banners for the carapace of my titans using the same method.
Ok so there’s a lot of stuff there about what needs to covered and elements I want to include but what about the point to all this?
What’s the aesthetic I’m after? I definitely don’t want to follow an existing Legio colour scheme – creating my own house will give me much more flexibility over what legion rules I can use. But what should it look like? I’ve got heaps of stuff in my head around this. One model that I’ve never been able to get out of my head is Richard Gray’s Lancer. If you’re a painter and you’re not a patron of Richard Gray’s, you should be so go and do that now then come back.
I think this is the best miniature paintjob I’ve ever seen, credit Richard Gray.
This just about knocks it out of the park for me. That blue is beautifully desaturated so it’s not invasive and makes a good canvas for that next level freehand. It’s converted (the shield isn’t off the shelf), the weathering is perfect. I just love everything about it and it’s just about as close to a heartbreaking work of staggering genius that I think a toy soldier could be. So I want an army of these. But I don’t want to copy this directly. I never could and that would just be weird anyway. I want to find my own desaturated colour and free hand schemes and really refer back to this for the weathering.
But what? Just pick a colour and desaturate it right? Well, no I don’t think so. If I just pick a colour, why that colour? Why not Richard Gray’s colour? I want something that I can really indulge in, unify the titans without them all looking exactly the same and have some story with. Two things have been buzzing round my head and, just so we’re clear, they’re quite nerdy and arty farty. My apologies in advance.
Picasso’s rose period.
I know, right? No one came here for this I’m sure but for me these pictures are something I can’t shake. I think the colours are beautiful, really destaurated (so would be great for freehand over etc) and the figures are really striking.
If I could have any of these hanging above the mantle piece it would be the family with their monkey. But I’m not going to copy these images on a titan panel (I don’t think so anyway) but the beautiful pinky grey of the landscapes is something I really do want to replicate – I think that will contrast nicely with some really sharp TMM steel colour.
Commedia Dell Arte.
WTF is this? Who let the nerd in the room? Well, my academic background is in theatre actually so I think you’ll have to give me this one. There are a few ideas here mixed up in my head. One is Commedia masks (Commedia is an early form of Italian street pantomime)
Whether it’s as head swaps (I think Harlequin stuff might be good for that) or on banners (I think masks are cooler when they’re not being worn) I want to use mask imagery on my titans. I think they (masks) can be very confronting (they are a main stay of horror movies for example) and that just feels cool for my big robots. The other thing that’s really stuck in my head at the moment and, actually, ties Commedia, Picasso’s acrobats and desaturated colours together nicely is the art of my favourite artist, James Ensor
Right, I knew it would take a while but by just writing it all down, I think I now know where I want to go.
At least with the miniatures themselves (not the bases or terrain, I’ll come to them in a different post):
TMM for the chassis with a dirty, oily (oil wash finish) as per VV’s video
Brighter TMM (no oil wash) for the armour trim (as per my competition entry)
Grey pink desaturated armour panels with skulls (I can paint those as per my competition piece) wearing masks.
For the smaller models (the knights) I’ll probably simplify some mask designs or use Pierrot imagery
I’ll do the same kind of designs on some banners and mix in some flower imagery (I’ve painted those before and live flowers looks really cool with skulls and ties in the with the Picasso painting above (‘boy with a pipe’)
Just to break things up so it’s not a repeated Flowers > Skull wearing a mask > Flowers pattern I’ll also look at any other motifs from 17th century Italian art (to keep with the commedia theme). A cursory internet search has already thrown up a bunch.
EXCELLENT. Well, I don’t actually have any paints with me right now and I’m a few weeks away from getting them so I still have time to flesh out what images are going where on what titans but it does mean I can build them now knowing, approximately, how I want them to turn out. ONWARDS! Comments always welcome.
Life has got in the way recently and I’ve had to do adult stuff. I did also do lots of hobby stuff but I had no time for blogging. The big changes recently are that I’ve had a baby and moved country. I’m now in Greece. In terms of hobby progress since I last blogged:
I built and painted a Tamiya tank for my twin boys
I finished, absolutely finished, my Craftworld army by improving the bases like this:
I’ve painted some objective markers for 40K
I finished my first competition entry miniature
So, when I look back at the first year of The Emperors Herdstone, how has it gone?
My goal was to build and paint armies for GW games and to enter tournaments with them. Well, it’s kind of gone ok (ish). I have finished armies for:
In terms of gaming, the only games I’ve managed all year were at the 40K GT (you can find my report here). That’s one of the things I really want to change this year. So what’s the plan for TEH season two?
Keep painting armies for new systems.
Increase the number of games I play.
I have only been in Greece for 18 hours but I have my Adeptus Titanicus sprues with me – they’ll be the next army I build. I have also realised I am only a few models short of an AoS army (Gloomspite Gitz).
I’m going to try to blog once a week (Sunday) from now on. Here’s hoping!
I’ve got quite a lot of hobby on the go at the moment. I’ve built a Knight for my children that I need to paint (and think of a way to transport back to the UK) and I’ve got a cool little side project on the go with some objective makers for when I win the 40K GT next year (LOLOLOLOLOLOL).
But these are just distractions, other stuff to pick up when I’m not in the mood to really focus on my main project – a mini for an online painting competition. The comp is being run by Purgatory miniatures and its to paint their Moloch Angel Form miniature.
I don’t play this game so I don’t know much about the mechanics but the miniature is cool. The closing date is June 30th (so still ages, I started the mini about three weeks ago). I’m not expecting to win anything, I simply want to be able to tick the box in my head that says ‘Entered a painting comp.’ Once that’s done I will try and be as brutal as possible about my entry and improve on it before a crack at Golden Demon next year.
Enough waffle, here’s where I’m at so far:
The flag things on his back are finished (except the metal rods than hold them in his back. Pretty pleased with these. I might add a few more vines / tendrils to the stalk going through the skull on the blue one because it’s a bit awkward at the moment but, also, I might not.
2. The Skin. The photos here are terrible – it looks better in the flesh (pun intended fully) but I’ll need to make sure the photos I take when it’s finished are on point because it’s an online competition so the pics will be all anyone has to go on. I used Vince’s fantastic skin technique and I’m pretty pleased.
With the GK Kill Team in the bag I’m moving onto something that I’ve never done before; I’m entering a single miniature painting competition. The comp itself is here (you might need to be a member of the ‘Eavier Metal painting group on Facebook to see it). I’d never heard of the game system or miniature manufacturer (Purgatory) before, I just noticed the comp and thought I’d enter (the closing date is June 30th).
The miniature itself is prescribed by the organisers. It’s non GW (not something I have a lot of experience with, my only other non GW models are the Batman game and Bolt Action).
Anyway, it’s not a very complex model so I’m going to try and push each element as I paint it. The first thing I’ve finished are the banners on his back. The got to a fairly decent stage just as ‘single,’ colours (there are lots of colours on here clearly:
Being moderately pleased with these I was nervous to add some freehand to these but they now look like this
And I’m pretty pleased with them so far. I’ll sleep on the progress so far then come back to them tomorrow (I’ve shown some mates and had some good feedback around making the cloth look more aged). I’m going to add more free hand to give the skulls some context – some chains to the red one and some flowers to the blue. The metal parts of the banners will be TMM eventually.
After spending months painting three SCE for a Nightvault warband (you can find out about them here) and before I spend three months painting a single miniature for my first competition (you can’t read about that yet because I haven’t started) I’ve bagged a whole game in the space of a few weeks.
My Grey Knights Kill Team is finished (except the bases, I’ll finish them at the weekend maybe) and I’m pretty pleased with them. Things I like:
The armour. The steel is shiney with a blue tint. That came with some patience and some really good paint product (esp. Vallejo Metal Color). You can find the guide to the armour here.
The Power Weapons. These really pop. I didn’t do a step by step guide for these but I used the technique of the awesome Sam Lenz -Youtube ‘Sam Lenz Power Weapons,’ and I’m sure you’ll find it.
Things I’d change:
The scrolls could be better (these were just flesh tone with a white highlight) if I took more time
Again, with more time, the shoulder pads could be neater (possibly) but I don’t hate them. You can find out how I did them here.
So with these boys done (actually I have two Kill Teams from one Strike Squad box) I really do think this is a great way to get into tabletop wargaming. I’m actually planning on using Kill team as a way of getting my hands on more models for quick projects. Next up…Not sure – I’ll get back to you!
I’m all over the place at the moment. I’m expecting a baby, trying to change jobs and living somewhere weird. It’s all going on. Actually for the last three years it feels like it’s all been going on, all the time. Non stop. My head hurts.
That’s where hobby time comes in. I’ve got loads of hobbies; Golf (haven’t touched a club for two years as I live a ten hour flight away from my playing partner (my father) and he becomes progressively more frail. Cycling (haven’t got on a bike for 18 months and, while that might change with a change of country / new job, a new baby is going to mean 5+ hour bike rides won’t be a thing). The clarinet (I live in an apartment and work long hours so I might get an hour a month).
Actually they’re clearly not hobbies at all, they’re things I know how to do or have done a lot of previously. Actually the more I think about it, the more I realise I have two hobbies: Playstation (esp. Sports games) and Painting miniatures. Now that’s fine, they are genuinely the two that fit my lifestyle now and I’m sure others will come and go but I need to let the others go now rather than being frustrated that I don’t do them enough (which is where I’m at now).
Where does painting miniatures fit into all of this? Well I started this blog as motivation to get armies / warbands finished that would incentivise me to go to tournaments and play more games. This has happened once with my 40K GT participation but the travelling is not really an option logistically or with the new family. So this hobby is increasingly becoming about painting miniatures to as high a standard as I can for the joy of painting as a pastime itself.
To that end, what’s on my painting table right now?
The Knight. This is a funny little project for my twin boys’ birthday. I’m going to build and paint the skeleton of the knight and the boys will paint the armour plates. They have really picked up on my modelling hobby and enjoy painting so this will need to get knocked out before I go back to the UK (not sure when that’s going to be).
The Grey Knights. If you’ve seen my NightVault warband (here) you’ll know that one of the things that needs some attention is my NMM steel. I bought these GK to make a Kill Team with and to learn NMM steel. Actually, given how long NMM takes to complete I’m actually going to go a different way with these and try a technique I’ve never used before – TMM. There are still force weapons on most of these guys which I can have fun with and I’m hoping that this will be an opportunity to knock a small project over in a short space of time. I’m alternating quick (40K army) and long (Gold NMM NightVault warband) projects and find it’s a good way to keep motivated. I think these will be the next cab off the rank – maybe with a little painting tutorial.
The Challenger Tank. Now things are getting left field. My birthday present from the boys. Given how little I actually play games I’m starting to realise that painting what I like is perfectly permissible. I have always had a little fancy for historicals (I’ve done some railway modelling before) so I’m looking forward to this. I think this will be the last thing to get painted out of this lot but I’m looking forward to trying some realistic weathering. I’ll be using lots of tutorials to make the most of this kit.
The weird little model. This is also new. I’m entering a painting competition. It’s just a little online comp run by a games manufacturer and the model is mandated as this one (it’s from their Purgatory game). The model is pretty cool and I have a long time to complete this (entries due on June 30th) so I’ll hopefully knock the GKs out quickly and spend a solid three months acing this. Again, I’ll dedicate some serious blog time to this project so I hope it’s interesting.